This article will explore how to configure or set up the SFTP server through SSH on the Ubuntu 20.04 system using the command-line method. We will see how the SFTP user allows limited permissions to a specific directory for others.
Now, paste the following lines at the end or bottom of the file:
The above configuration will allow the sftp users group to access their home directories through the SFTP. However, not allowed to access the normal SSH shell. Save the above-mentioned lines in the configuration file and close it.
Now, the SSH configuration for SFTP users has been set up on your system. Next, you will create a new SFTP user account and assign permissions.
Here, we have created a new sftp user named ‘samreena’ as follows:
Set the password for the newly created sftp user by typing the following command:
The above command will change according to the name of the sftp_user.
Here, the SFTP server configurations are completed. Now, you can log in with the sftp credentials to check either everything is working properly or not.
When you connect for the first time via the SFTP, the following dialog appears on the terminal screen. Type ‘yes’ to continue the connecting process. Now, set the password for the sftp user. After that, the following connected to 127.0.0.1 messages shows on the terminal window, and now you logged in on the sftp.
Now, navigate into the sftp_user’s home directory. Since the sftp user has only access to the home directory. So here, create a new directory with the name ‘test-sftp’ to verify that sftp is working properly.
 On a successful connection, the following interface will show:
 Once you connected via the SFTP server, you can access your home directory and its directory contents as follows:

Prerequisites
You need root privileges for creating a new SFTP user and for executing the administrative commands.Setting up SFTP Server on Ubuntu 20.04
Follow the following provided steps to set up the SFTP server on Ubuntu 20.04 system:Step 1: Install SSH
As we mentioned earlier, SFTP works over SSH. So first, it is required to install SSH on Ubuntu 20.04. If you have not already installed SSH on your Ubuntu system then, install it by running the following apt command: $ sudo apt install sshStep 2: Change SSHD configuration for SFTP group
After installing the SSH, you need to change the ‘/etc/ssh/sshd_config’ SSHD configuration file. So, use nano editor or any other to open this configuration file as follows:$ sudo nano /etc/ssh/sshd_config
Match group sftp
ChrootDirectory /home
X11Forwarding no
AllowTcpForwarding no
ForceCommand internal-sftp
Step 3: Restart SSH services
For making the new changes to take effect, restart the SSH service using the ‘systemctl’ command:$ sudo systemctl restart ssh
Step 4: Create SFTP users group
To grant SFTP access to users, you will create SFTP user accounts. First, create a new user group for ‘SFTP’ users. For our convenience, all SFTP users will belong to the same group. So, run the below-mentioned command to create a new SFTP group:$ sudo addgroup sftp
Step 5: Create a new SFTP user
Once the new group is added, create a new sftp user and then add this user into the sftp group by running the following command:$ sudo useradd -m sftp_user -g sftp
$ sudo useradd -m samreena -g sftp
$ sudo passwd sftp_user
$ sudo passwd samreena
Step 6: Grant permissions to the specific directory
In this step, you grant full permissions to the sftp user on their home directory. But, other users on the system are not allowed to access this directory. So, grant access using the ‘chmod’ command as follows:$ sudo chmod 700 /home/sftp_user/
$ sudo chmod 700 /home/samreena/
Login through the SFTP
You can log in via the SFTP by using two different methods:- Connect to the SFTP by using the command line method
- Connect to the SFTP using the GUI
Method 1: Connect to the SFTP using the command line
You can connect to the SFTP server either using the IP address or system hostname. We are using the same system on which we have configured the SFTP server. Open the terminal and connect via sftp by using the sftp_user name along with the loopback address 127.0.0.1 as follows:$ sftp sftp_user@127.0.0.1
$ sftp samreena@127.0.0.1
sftp> cd sftp_user
sftp> mkdir test-sftp
sftp> ls
Method 2: Connect to the SFTP using the GUI
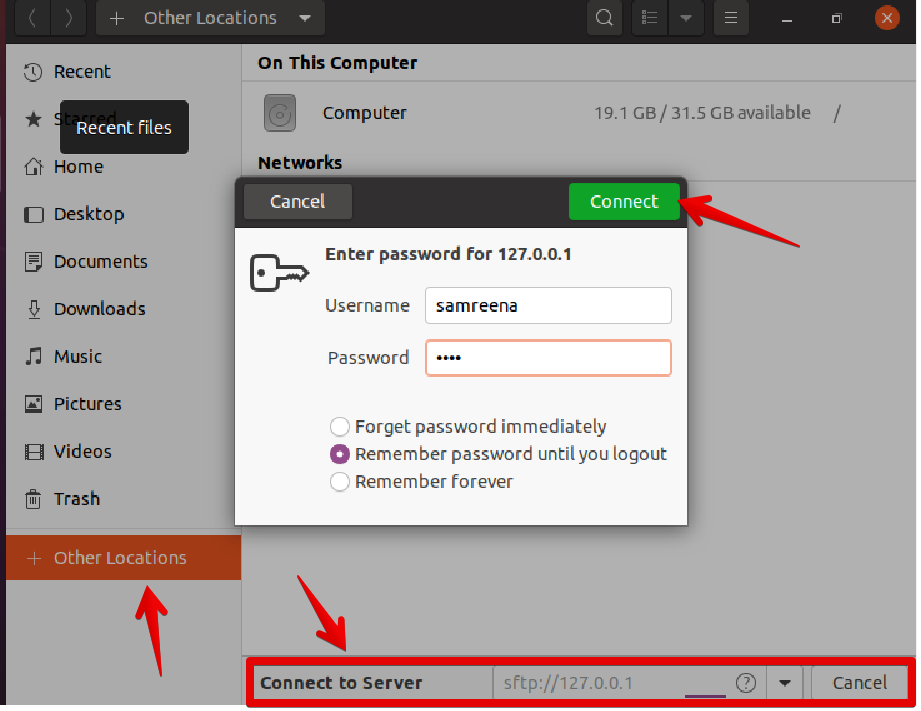
You can connect to the SFTP server using the GUI SFTP client application. You can either connect with the preferred SFTP client or use the built-in default Ubuntu Nautilus file manager. Open the Nautilus file manager using the application menu and then click on the ‘other Locations’. Now, at the bottom of the current window, enter ‘sftp://127.0.0.1’ in the connect to server box and then click on ‘connect’. Enter the SFTP account credentials which you have been set up above and click on the connect as follows:
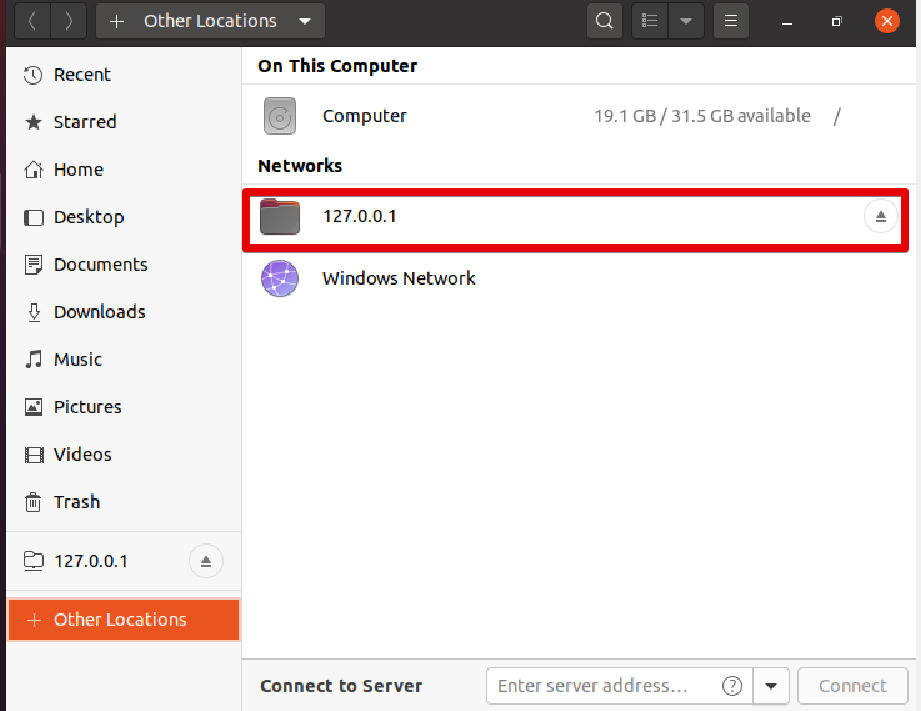
On a successful connection, the following interface will show:
Once you connected via the SFTP server, you can access your home directory and its directory contents as follows: